
I've been doing quite a bit of monster hair making lately. It's really something that I enjoy, so I'm sharing my technique.
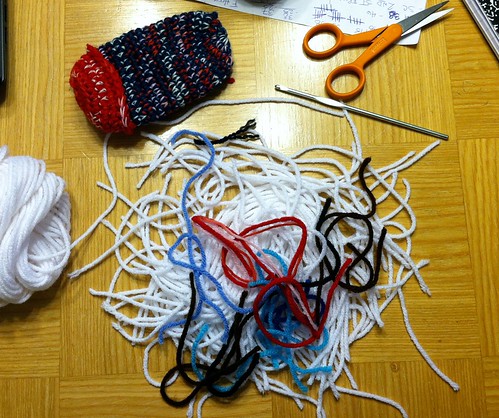
Today we're working on hair for a new mini monster. You will need: an ugly table with some space on it, a crochet hook, yarn "scalp color", cut yarn pieces (I cut mine around 8 inches... then I can cut them to whatever later. Plus longer yarn hair pieces are easier to work with.), one giant tapestry needle that scares you beyond words, some scissors, and the doll that you'll be giving some hair to.


Now wrap both pieces of the other end of the hair around your hook, and pull it through the loop.
Ta da! You just made a piece of hair. This is really a lot like latch hook... that just dawned on me. If you were good at latch hook, this should be a walk in the park.

Move over to the next back post and repeat the entire process.
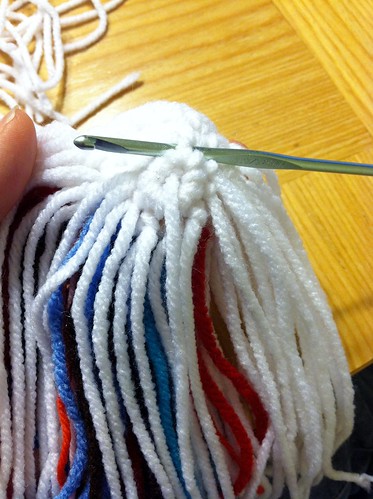
Ta da! You are like Rogaine. (I am in no way affiliated with Rogaine.) Keep repeating this process. I like to do half of the "scalp" circle. I start on the outer edge, and once that's filled I start the inside sections one row at a time.


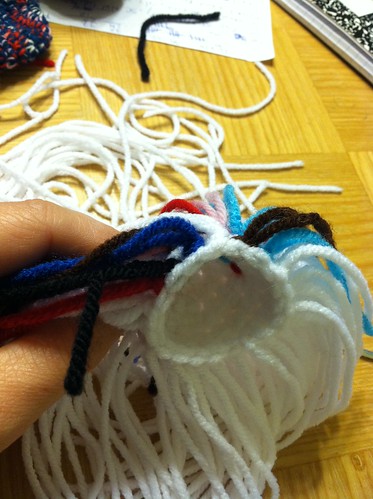
I pulled the yarn tail from when I started the circle through the center of the "scalp" to act as another piece of hair. LESS TO WEAVE IN OR HIDE!
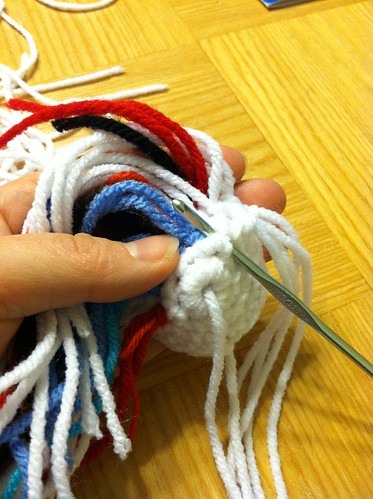
Once you have done one side of the "scalp" you will keep doing what you were before on the other side. The only differences are your hair is now hanging down and you'll be working from the inside rows to the outside rows.
This is what it looks like from the back all finished.

This is what the "scalp" looks like from the inside.
Place or pin your hair (I don't pin it because it becomes a poking hazard for me. Don't ask.) Then sew it in place with that giant tapestry needle using a whip stitch. The whip stitch is basically the yarn going through the thing you are sewing upon to going through the thing you are sewing onto... over and over and over. (Is that even English?) Also, I sew my hair on before stuffing. I find it easier to hold everything and not stab myself with the needle.

You can give your little doll a haircut if you like. My yarn is always way too long in one part of the head for some reason. My monsters always need a little trim to even them out.

That's it. You now have crocheted amigurumi hair. Cool, no?

Abbreviations:
ch - chain
sl st - slip stitch
sc - single crochet
st - stitch
Copyright 2012 Knot By Gran'ma. Please do not repost this pattern anywhere on the web or in print form. Thanks.
Subscribe to the Newsletter!
(Newsletter includes news and promotions...)

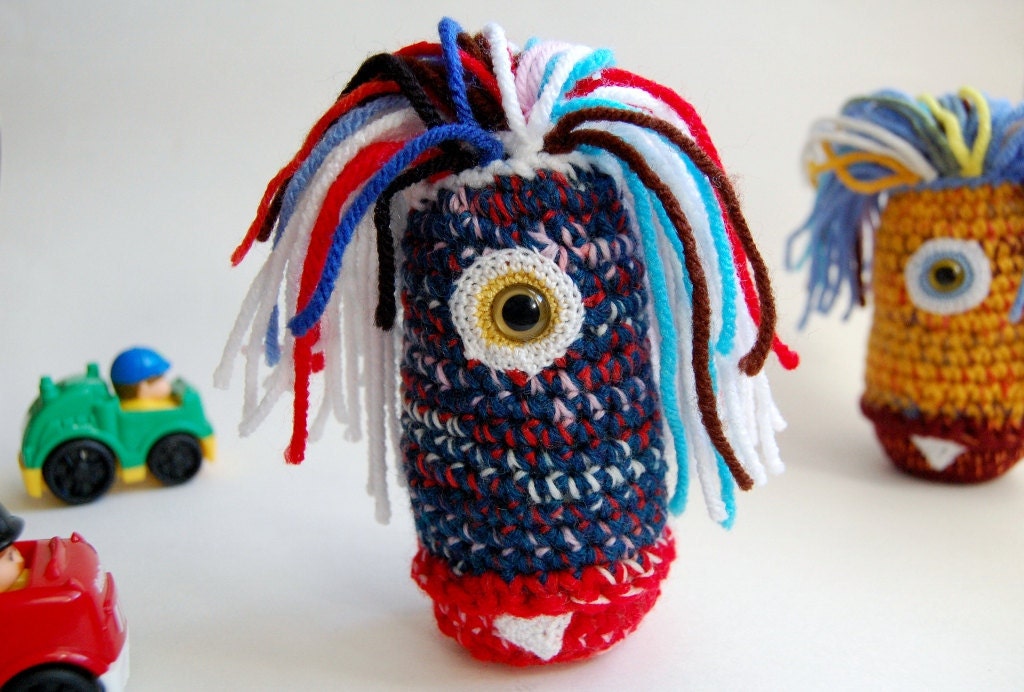 |
| mini monster with hair |
Crochet a circle to act as your scalp. This particular one is:
- ch 4, sl st to form a loop
- 8 sc into loop - 8 sc
- (2 sc next st, sc next st), repeat 3 more times - 12 sc
- (2 sc next st, sc next st), repeat 5 more times - 18 sc
- sc each st around - 18 sc
I left a long tail when I fastened off the circle, because that's what I'll use to sew the hair to the monster. You can make your circle bigger or smaller... depending on the size of the doll that it's going on.
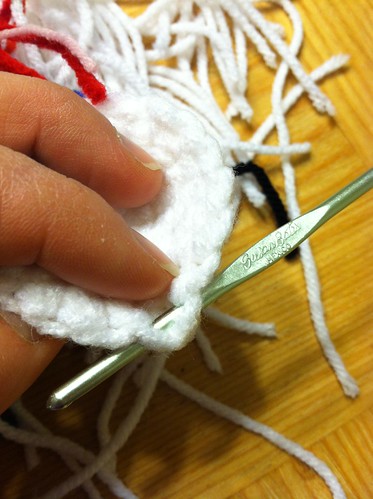
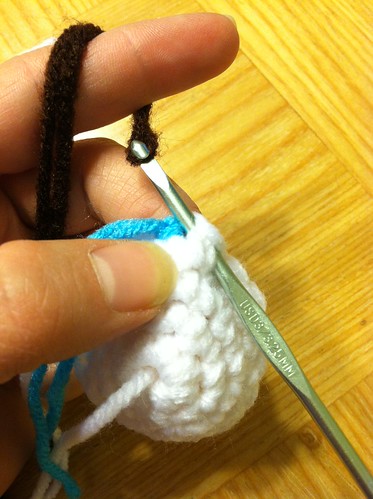
I like to start at the edge of the scalp. It doesn't matter where. For this particular monster, I had different colored pieces of yarn that were going to go in the front. I used those up first, because it's easier for me. I don't know why. That's just how I do it. Put your crochet hook behind the post of your stitches. You're placing your hook under one crocheted stitch and bringing the hook out under the stitch next to it. I hope that makes sense.
You should be able to see your hook when you flip the "scalp" over.
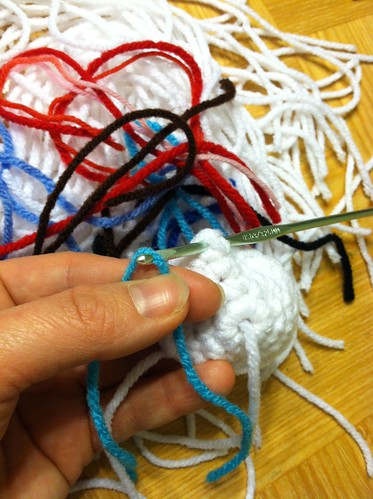
Take the piece of hair (yarn) and fold it in half.
Pull that piece of yarn through your back post so that it now sits where your hook just was. Don't pull it all the way through.
Now wrap both pieces of the other end of the hair around your hook, and pull it through the loop.
Ta da! You just made a piece of hair. This is really a lot like latch hook... that just dawned on me. If you were good at latch hook, this should be a walk in the park.
Ta da! You are like Rogaine. (I am in no way affiliated with Rogaine.) Keep repeating this process. I like to do half of the "scalp" circle. I start on the outer edge, and once that's filled I start the inside sections one row at a time.
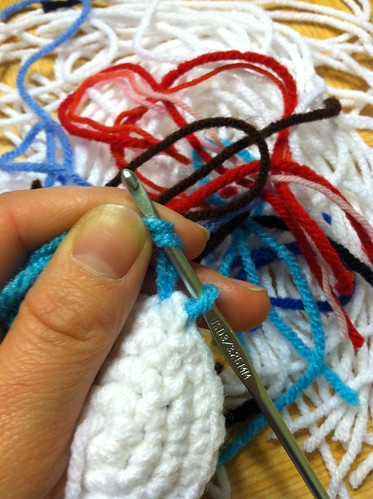
The inside sections are the same as the outer ones. Insert the hook through the back of the stitch post... just on the row below.
I pulled the yarn tail from when I started the circle through the center of the "scalp" to act as another piece of hair. LESS TO WEAVE IN OR HIDE!
Once you have done one side of the "scalp" you will keep doing what you were before on the other side. The only differences are your hair is now hanging down and you'll be working from the inside rows to the outside rows.
This is what it looks like from the back all finished.
This is what the "scalp" looks like from the inside.
Place or pin your hair (I don't pin it because it becomes a poking hazard for me. Don't ask.) Then sew it in place with that giant tapestry needle using a whip stitch. The whip stitch is basically the yarn going through the thing you are sewing upon to going through the thing you are sewing onto... over and over and over. (Is that even English?) Also, I sew my hair on before stuffing. I find it easier to hold everything and not stab myself with the needle.
You can give your little doll a haircut if you like. My yarn is always way too long in one part of the head for some reason. My monsters always need a little trim to even them out.
That's it. You now have crocheted amigurumi hair. Cool, no?
Abbreviations:
ch - chain
sl st - slip stitch
sc - single crochet
st - stitch
Copyright 2012 Knot By Gran'ma. Please do not repost this pattern anywhere on the web or in print form. Thanks.
Subscribe to the Newsletter!
(Newsletter includes news and promotions...)
Great tutorial!
ReplyDeleteThanks! I'm working on sharing more stuff like this. :)
DeleteI didn't know monsters were so concerned with having neatly even hair! :-)
ReplyDeleteThanks for the tutorial!
OMG.... too funny!
DeleteLove the step by steps, but the commentary blurbs are hilarious. Keep up the great work
ReplyDeleteHa! I will. There are lots of these little tutorials in the works. :) Commentary and all...
Delete